By: Andy Cockburn, NAIMA Canada
Millions of existing homes across North America need help improving their performance. Enhancing comfort, reducing energy costs, and lowering greenhouse gas emissions are all key priorities. One of the most effective ways to achieve these goals is through a deep energy retrofit (DER).

The DER planning process starts with the building envelope first, which includes air tightness, insulation and openings. To preserve the sanity of the people living in those homes, improving the envelope may be done most easily by tackling the job from the outside. This approach minimizes disruption for occupants and makes efficient use of exterior space, without sacrificing valuable square footage inside the home.
A “chainsaw retrofit” uses this exterior approach, removing existing layers on walls and roofs, and building out again to optimize airtightness and insulation. The “chainsaw” part comes in when the renovator removes parts to bring the building to a more workable shape. It does not mean literally cutting the whole house apart!
Talking about deep energy retrofits is good, but it’s even better to see what the process looks like from start to finish. The mission of visually expressing DER’s with real-world case studies is exactly what Retrofit Canada in Edmonton, Alberta is doing, compiling and sharing the HOW and WHAT of energy retrofits in pictures, data, and descriptions.
Chainsaw Retrofit Case Study: Transforming a 1969 Split-Level Home
STEP ONE: Remove exterior layers
Exterior layers are removed – siding, roofing, underlayment.
Foundation perimeter is “hydro-vac” trenched, to allow for insulation basement walls on the exterior.
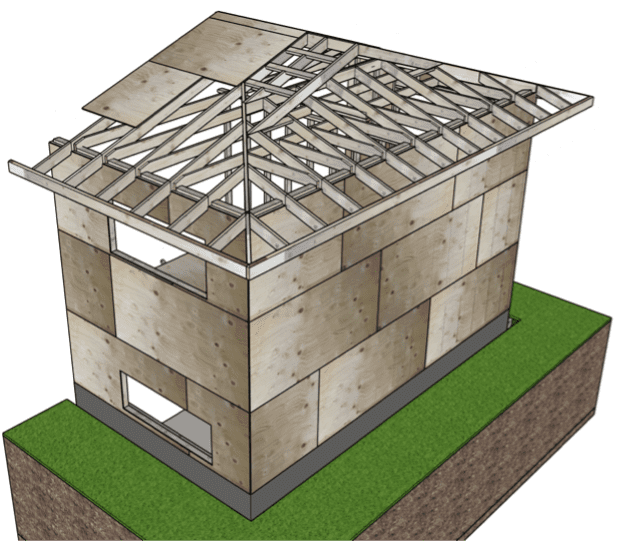
Roof Sheeting is removed to allow access to rafter tails. In this case, the retrofit required a modification of the hip roof.

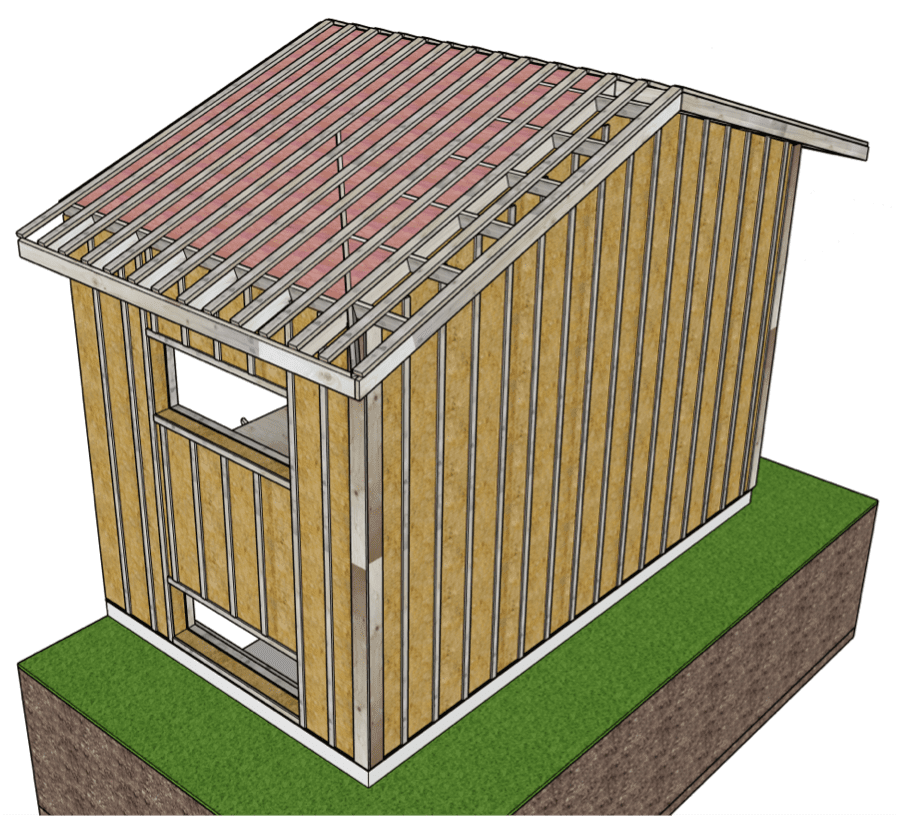
STEP TWO: Remove projecting roof parts
Rough fascia and rafter tails are removed and cut back, bringing the roof flush to the plane of exterior walls.
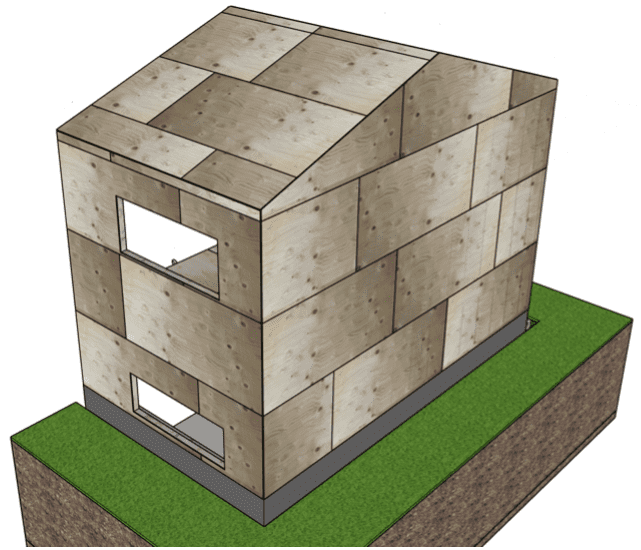
With the roof frame modified, the shape of the building is now easier to work with. This is sometimes called a ‘Monopoly House’.
STEP 3: Install new membranes, foundation insulation, and roof structure
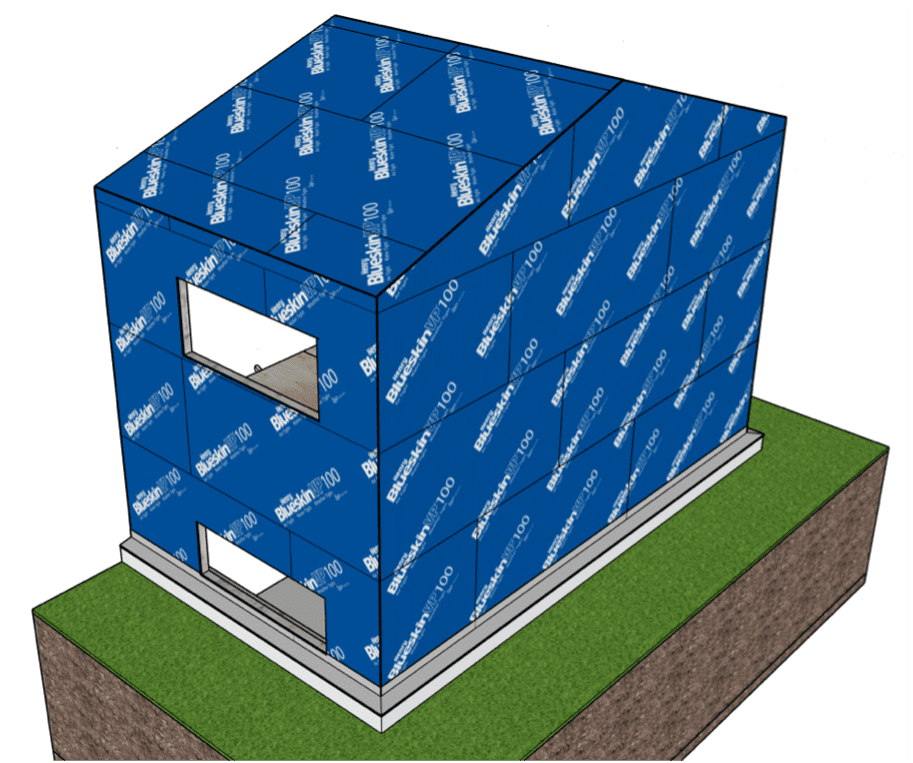
The ‘Monopoly House’ shape allows for easy continuity of a new airtight membrane / WRB.
R20 insulation was added to the foundation exterior with wall flashing and parge layer.
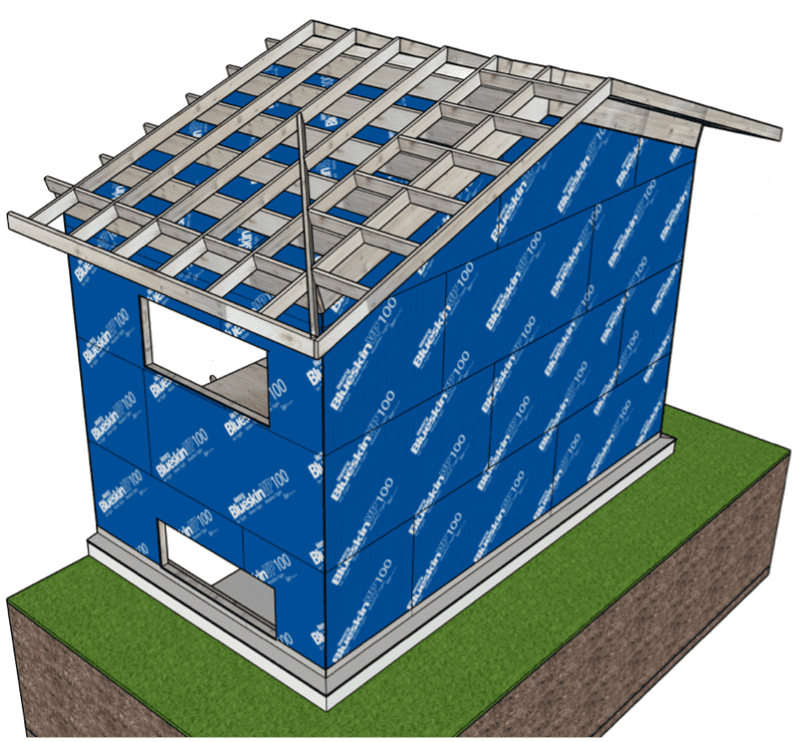
From here, a new roof structure was added to accommodate deep insulation and new overhangs.
The exterior application of airtight and thermal layers can eliminate thermal bridging and reduce air leakage considerably, raising comfort levels and cutting energy losses.
Projects like this one from Solar Homes highlight the skills needed for both envelope work and general carpentry. While energy retrofits can be detailed, builders and renovators with the right training and experience will be well prepared to take on the many retrofits that lie ahead.
STEP 4: Install new insulation layers
Exterior walls were treated to 6” of mineral wool semi-rigid board insulation, while the roof surface received 18” of fibreglass insulation batts.

SPECIAL NOTE: The approach shown here takes care of a problem common to many homes with shallow roof slopes. The tight wedge of space where the roof meets the exterior walls. This space is notoriously difficult to insulate and air seal properly and, by shifting the thermal and air control layers to the outside, the chainsaw method makes that problem go away.
STEP 5: Prepare substrate for new exterior finishes
The exterior insulation layers are layered over with wood strapping to allow for good nailing surfaces and to provide for a rainscreen / back venting layer. Drying potential to the outside is an effective way of decreasing moisture build up and prolonging the integrity of assembly materials.
STEP 6: Install new roofing and exterior finishes
A new steel roof, flashing, soffits, finish fascia, and rain gutters were added. New concrete fibre “clapboard” siding was added, with architectural stone facing on the basement window knee wall.


COMPLETED PROJECT!
This retrofit decreased the energy usage of this home by approximately 70% compared to its original performance. With the addition of a solar PV array, energy demand from the grid was brought down even further to near Net Zero.

One of the biggest challenges we have for the energy efficiency of our existing residential housing is in answering the question: “HOW do we do the job?”. The planning, measuring, preparing, and execution of deep energy retrofits is no small task, but there are ways of making forward progress.
By showcasing projects like Peter Darlington’s 1969 Split-Level chainsaw retrofit, Retrofit Canada is helping create a practical roadmap for renovators and contractors nationwide. Their work shows that deep energy retrofits are entirely achievable. Sharing detailed information and results from successful retrofits helps the whole industry grow, and NAIMA Canada is proud to be part of that effort.
Head over to Retrofit Canada’s Case Study Library to learn more about this chainsaw retrofit.